Recently I have received two Pro Mini 328 which I have ordered one month ago from Ebay. I bought them from gc_supermarket seller. Although Pro Mini was not something new from Arduino but it was my first time to use an Arduino Pro Mini so I am going to give my review on it. It might be useful for you in selecting which Arduino to use in your future projects. Summary of consideration in buying Pro Mini is available at the end of this article.

First, let us look at the specifications for Pro Mini, specifically Arduino Pro Mini 328 5V/16MHz:
- Microcontroller: Atmega328P (TQFP)
- Operating voltage: 5V
- Input voltage: 5V ~ 12V
- Digital I/O pins: 14
- Analog Input pins: 8
- Clock speed: 16MHz
- Comes with on board power and status LED
Note: There are a few versions of Arduino Pro Mini available. They are 5V/16M with Atmega328, 3.3V/8M with Atmega328, 5V/16M with Atmega168 and 3.3V/8M with Atmega168.
After a research on the microcontroller used in Pro Mini, which is Atmega328P, out of my surprise it has 8 analog pins as compared to regular Arduino Uno (6 Analog pins). Although both Uno and Pro Mini are using the same microcontroller, but according to the Atmega328P datasheet, there are 8 channel of 10 bits ADC in TQFP and QFN/MLF package. This is one of the highlights in Arduino Pro Mini.


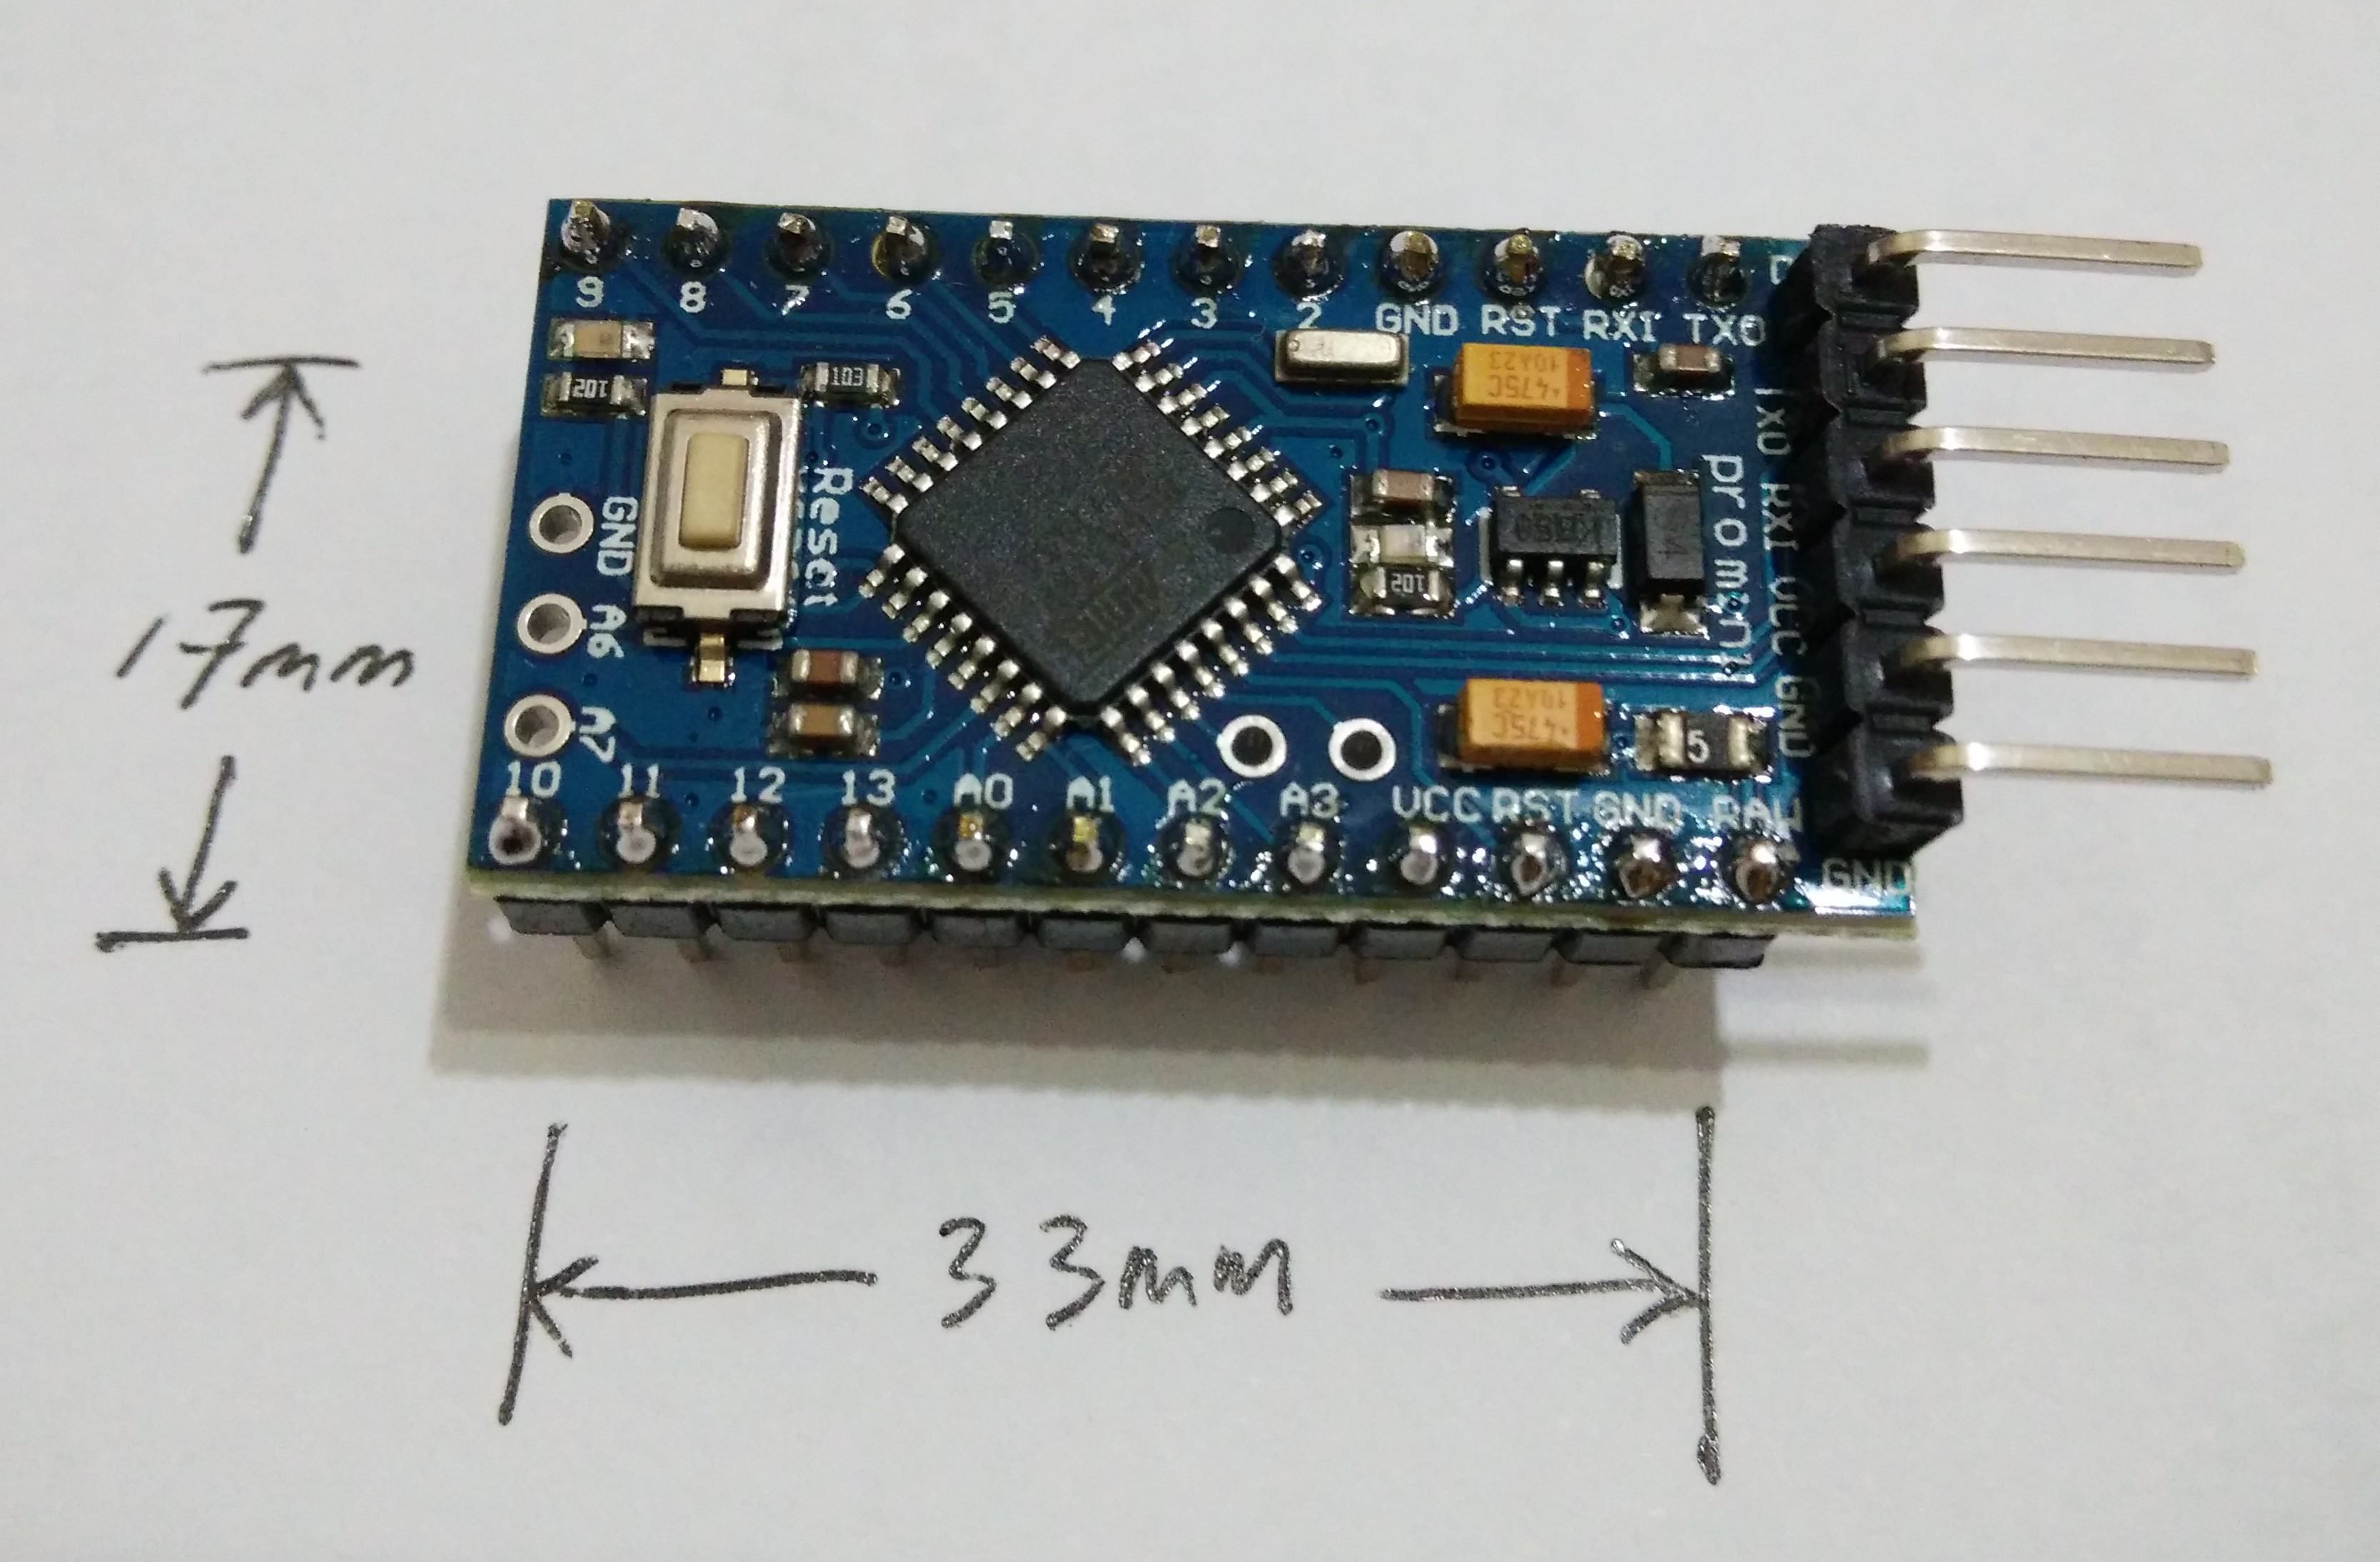
Arduino Pro Mini comes in a compact form factor with its dimension 33mm x 17mm (less than quarter Arduino Uno size). This can be useful in projects where size matters, as it can be easily fitted into enclosure.
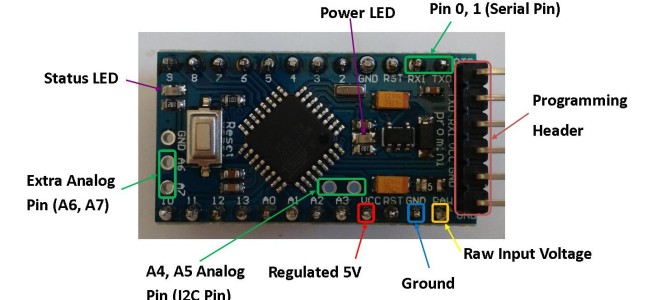
I have also created a board labelling for the Pro Mini. The top and bottom row of I/O pins are breadboard friendly, which allows prototyping directly onto breadboard. However, there are 4 Analog Pins which are not breadboard friendly, therefore you will need to solder the header on top of PCB instead of bottom.

The Raw Input Voltage pin is used for external power supply ranging 5V ~ 12V. The on board regulator will produce regulated 5V output. If the circuit is “power hungry”, it is advisable to use external regulator to prevent any damage to the Pro Mini.
Now, I am going to show the unboxing of Arduino Pro Mini that I have received. Each of them comes with a separate packing, which consists of:
- 1x Arduino Pro Mini board
- 2x 20 pins male pin header
- 1x 6 pins right angle pin header


Since the Pro Mini comes un-soldered, it gives the user the flexibility of pin connections desired, be it using the pin headers provided or other header connections. So I am going to use the pin headers provided on Pro Mini.


On first power up, the board is preloaded with the standard blink sketch. If everything works perfectly, the status LED will blink every one second.

To test its functionality, I will upload another simple sketch to test whether it works or not.
Since the Pro Mini comes without any USB-to-Serial converter, thus you will need an external converter to program the Arduino. Here I am using a FT232RL USB-to-Serial converter breakout board to program the Arduino Pro Mini.


Before uploading the sketch to Pro Mini, remember to change the Board settings in Arduino IDE, Tools>Board>Arduino Pro or Pro Mini (5V, 16MHz) w/ Atmega328.

I’ve uploaded a simple sketch to blink the LED at a faster rate and everything works perfectly.

To sum up this review, I have list down some of the key points which could be useful when you need to use Arduino Pro Mini.
- Small and compact (Size matters)
- Comes without programmer, require external programmer to upload sketch
- Available at lower cost (since it does not include programmer)
- Two additional Analog Input pins (A6, A7) compared to Arduino Uno
- Unable to use Arduino Shield directly

Wow! Starting to write review? I have an Arduino Nano compatible (if not mistaken), wanna try and write one more review? =P
Yes, just making a simple review as I am using it. It might also help others when choosing which Arduino to use.
Interesting, I can make a review for the Nano as well.
tres bonne description merci
Thanks for the detailed review. I am looking for to work on Arduino Pro Mini 328 and this article gives a good overview of it.
Glad it helps to you. Good luck working with your Arduino Pro Mini.